🏆 PREMIUM 3D models | ⚙️ Functional equipment | 📉 Low prices without intermediaries |🚀 Fast download without viruses |🔒 Secure payment | 🛟 Tips and Tricks from the Designer

1g float for river fishing | FRC-1000
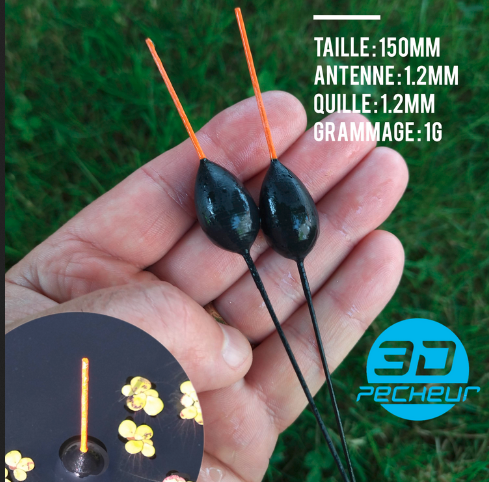
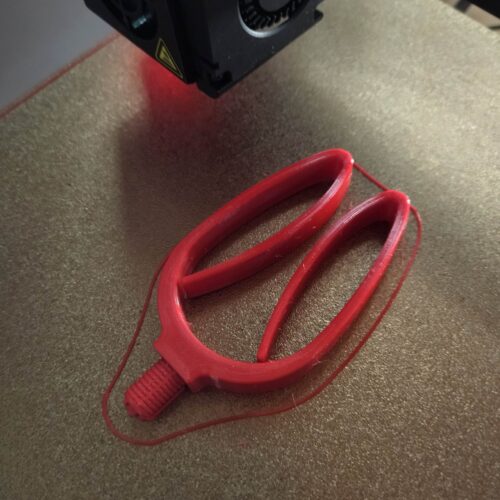
3D print-in-place float with integrated 150mm antenna and keel‘
🆔 DESIGN NO. : 683
⚙︎ Formats : STL
𐊵 Version : 1.0
⦸ No AI - No virus
© License : Apiobi UPPE / Personal and private use only
1,90 €
- Premium quality
- Low prices direct from the designer
- VAT 0% : VAT not applicable, Art. 293 B of the French General Tax Code
- Secure payments
Description
1G float for river fishing. To achieve a sensitive, robust and balanced model with a thin keel and tip, the shape and especially the junctions between the different parts of the float were reinforced for 3D FDM printing of the model.
Buoyancy is remarkable. With the same dimensions, this float can support up to 0.5g more weight than a foam body.
Size : 150mm | can be reduced to 135mm by reducing the antenna (max 5mm) and keel.
Antenna : diameter 1.2mm, size 40mm
Keel: diameter 1.2
Grammage : between 1g and 1.5 depending on post print finish.
Add 3 silicone rings
If you've ever printed a part that needed to be watertight or airtight (like a vase or a float), you know that this requires perseverance and specific settings on your slicer and good calibration of your printer. But it's perfectly feasible with an FDM 3D printer, and perfectly functional.
My models are designed for FDM 3D printing. They are designed to meet the specific needs of demanding anglers.
They are designed/printed/tested repeatedly in real-life fishing conditions until optimum results are achieved.
Technical Tips for 3D Printing
In absolute terms, to be watertight and solid, the walls must not be less than 1.2 mm thick AND with a minimum of 3 walls.
Filling: 0 to 5% maximum (0% personal).
Filament: PETG is both strong and flexible. Forget PLA!
Nozzle: 0.4 mm is a maximum.
Layer height: 0.12mm; with some brands of PETG, printing in 0.12mm is sometimes a problem, in which case try 0.16mm.
Slicer orientation: the float must be printed flat with a support.
Here's how I do it - you'll get just as good results with your favorite settings!
Applying a scale factor: not recommended because of the proportions involved.
Post-printing processing and finishing :
The float must be painted and/or varnished to improve its visibility. Varnish fills any holes, reinforces hardness and guarantees watertightness. As a reminder, 3 coats of varnish are recommended for finishing. For those in a hurry or less handy, fluorescent nail varnish for the antenna and clear nail varnish for the body will do the trick. A can of acrylic gloss or matte varnish costs less than 3 euros 😉
Post-print finishing of photo model :
* 3 spray coats of black body paint
* 2 brush coats of orange for the antenna after 1 coat of primer
* 3 coats of matte spray varnish over the entire surface
Only logged in customers who have purchased this product may leave a review.
Questions & Technical Discussions
Ask a question about this 3D model
Vous devez être connecté pour poser une question.
You may also like…
-

Lotus‘ cane holder | MEDIUM size | 3Dpecheur cane holder
-

Cane holder ‘Lotus’ | LARGE size | 3Dpecheur cane holder
-
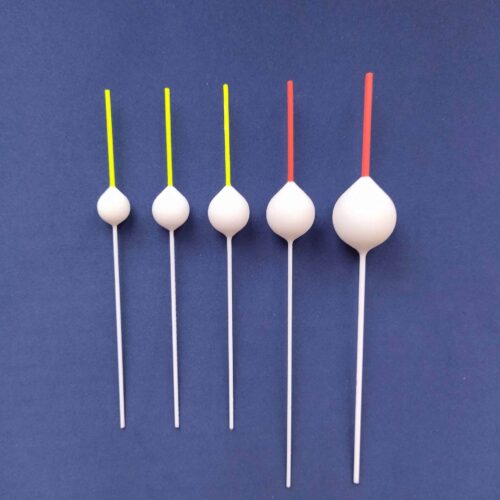

Complete range of 5 round ‘ball’ floats | RSPF1 to RSPF5
-

Round float - «Ball» - 0.3 GR - RSPF2
-

Bait ball press - BAIT BALL PRESS Ø20 mm | Carp fishing | Print in place - BBP20
-
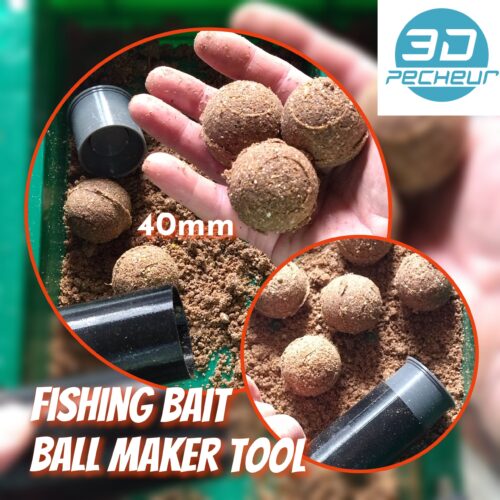

Bait ball press - BAIT BALL PRESS Ø40 mm | Carp fishing | Print in place - BBP40
Related products
-
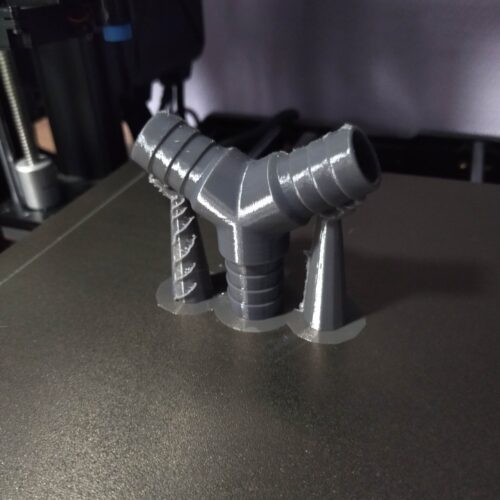

Y-pipe connector diameter 20mm (3/4 inch) | 3-way liquid pipe connector | Y001-20
-

Adjustable SNAG BAR set 135mm and 165mm | Snag Ears | Carp fishing | Print-in-place
-
![Long reach door latch [arrowhead] caravan - motorhome - recreational vehicle - horse trailer - boat](https://apiobi.com/wp-content/uploads/2026/02/Long-door-retainer-catch-motorhome-campervans-van-boat-garden-gate-3D-STL-DIY-scaled-500x500.jpg "Long-door-retainer-catch-motorhome-campervans-van-boat-garden-gate-3D-STL-DIY")
Long reach door latch [arrowhead] caravan - motorhome - recreational vehicle - horse trailer - boat
-

Butt Grip Small 3Dpecheur rod holder | CARP fishing | BGR1
-

Butt cup | CARP fishing | Rod pod support - Sky pod
-


Classic knife gate valve handle FAP | FAHA002
-

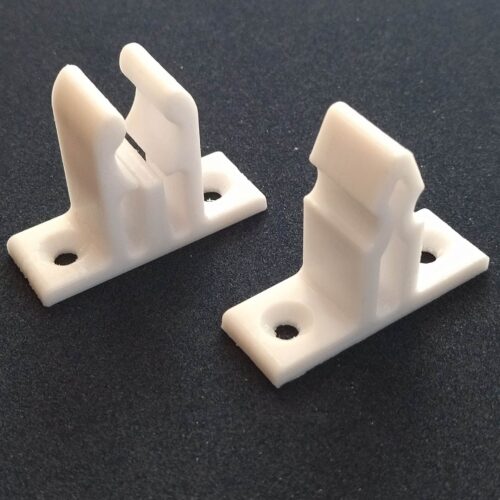
Classic door check - Male and female door latch for motorhomes, caravans, recreational vehicles - Spare parts | Bloque, bloc-porte van et fourgon aménagé
-

Top kit rig clip | ∅4 mm max | TKRC004
-
")
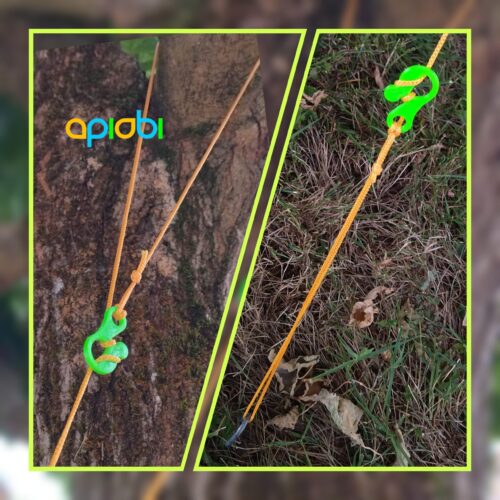
Rope tensioner clip | Rope fastener, optimized design for camping, fishing, outdoor activities, motorhomes and awnings | RTC002
-

Round handle for knife gate valve FAP | Spare part for waste water tank for motorhome, caravan, van | FAHA001
Reviews
There are no reviews yet.